Dryer takes too long to dry? Assume restricted airflow first—most “2–3 cycle loads” are a vent problem, not a dryer problem.
If your dryer heats but clothes stay damp, your job is simple: get moist air out of the house fast. This page is a one-stop playbook that blends airflow math, fast tests, and safe fixes—so you don’t waste money replacing parts that aren’t broken.
Key number #1A common baseline is 35 ft max developed duct length for 4″ rigid duct (then reduce for bends).
Key number #2Each 90° elbow often “costs” about 5 ft of effective length (rules vary).
Key number #3If airflow is weak outside, stop blaming the heater. Fix the vent path first.
What this page does (one page = full playbook)
- Separates airflow restriction vs heating/sensor issues in under 10 minutes.
- Gives a technician-style sequence (fast wins first, deep checks later).
- Includes a vent length + elbow “airflow math” so you can predict repeat clogs.
⚠️ Safety first (heat + lint + electricity / gas)
- Unplug before moving the dryer or touching the vent connection. Let the unit cool.
- Stop immediately if you smell burning that returns quickly, see scorching, or the dryer is extremely hot to the touch.
- Gas dryer: if you smell gas, stop now and follow local safety guidance (ventilate + professional help).
- Do not vent into an attic/crawlspace. That’s a moisture/structure hazard—not just “long dry time.”
Updated: 2026-01-22 • Category: Washer & Laundry • Airflow-first diagnostics for electric + gas dryers (plain English, no parts roulette)
The sneaky thing about long dry times is this: the dryer can still feel hot, still “run normally,” and still fail to dry. I’ve watched people replace a perfectly good heating element while the real problem was a crushed duct behind the machine. When moist air can’t escape, your dryer is basically trying to dry clothes inside a warm, humid bubble. Fix the exhaust path—and the same dryer suddenly performs like it’s new.
On this page
1) 10-minute triage: airflow vs heat vs sensors
2) Fast wins: outside hood + transition duct
3) Airflow math: developed length + elbow penalties
4) Deep clean: the hidden choke points
5) Sensors & settings: “Sensor Dry” lies (sometimes)
6) Long-run solutions: reroute vs booster fan
7) Diagnostic matrix + decision table
8) FAQ
1) 10-minute triage: prove airflow first (then worry about heat)
Most long-dry complaints fit one of three buckets: (A) airflow restriction, (B) weak/no heat, or (C) Sensor Dry ending early. The win is to classify correctly before you touch a screwdriver.
The 3 “truth checks”
- Outside hood check (best first test): run the dryer 2–3 minutes and check the outdoor vent. You want steady warm exhaust and a flap that opens confidently—not a weak flutter.
- Timed Dry vs Sensor Dry: if Timed Dry works but Sensor Dry quits early, suspect dirty moisture sensors or residue.
- Airflow vs heat clue: a dryer that’s hot inside but the room feels humid often means moist air isn’t leaving the building the way it should.
About the “vent disconnected” test
Some techs briefly test airflow by disconnecting the vent and watching performance. That can confirm a restriction fast—but it also dumps moisture (and lint) into your home. If you try it at all, keep it very brief, electric dryers only, and ventilate the room. For gas dryers, skip this test and use the outside hood check instead.
2) Fast wins: outside hood + the duct behind the dryer (the usual culprits)
If your dryer takes too long to dry, don’t start with the heater. Start where airflow dies: the outside hood and the transition duct behind the machine. These two spots cause a shocking number of “2–3 cycle loads.”
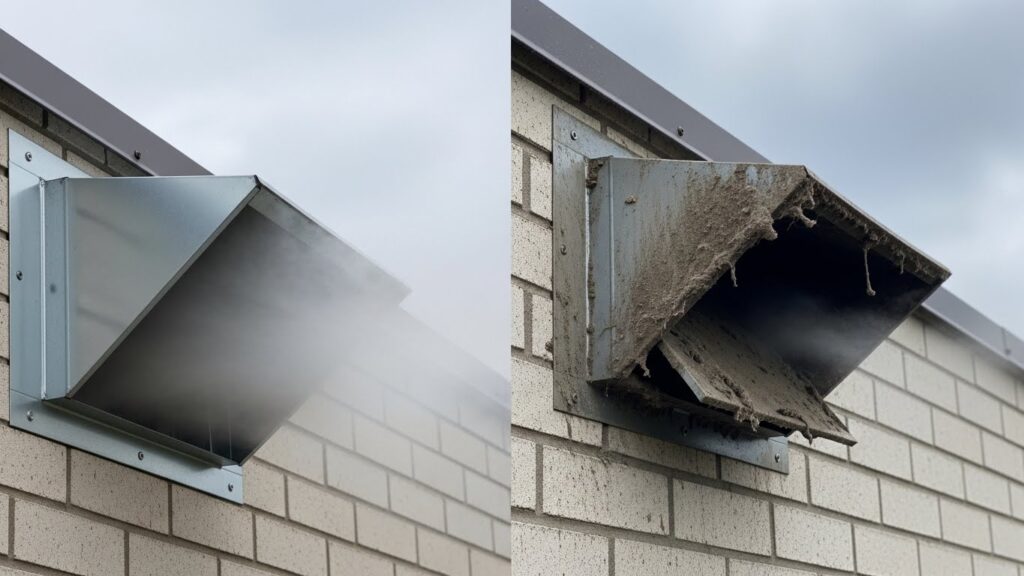
- Outside hood: lint mats, stuck flaps, crushed hood, or fine mesh screens that turn into lint filters.
- Transition duct: crushed/kinked flex when the dryer is pushed too tight to the wall.
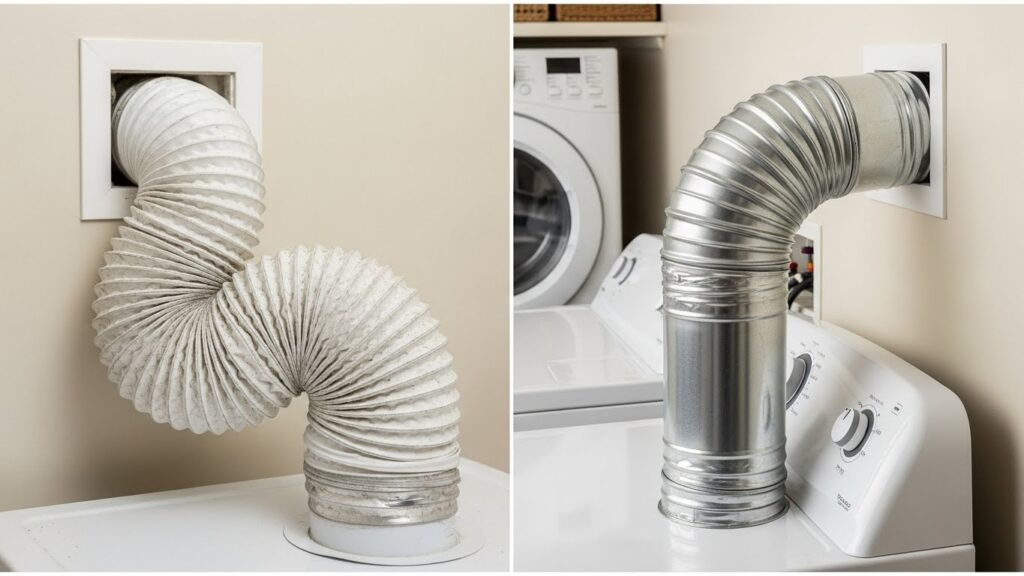
- Wrong material: avoid plastic or thin vinyl ducts. Prefer short, smooth metal (semi-rigid) where allowed.
- Bad connections: screws poking into the duct snag lint. Clamps + foil tape are typically safer for smooth airflow.
3) Airflow math: developed length + elbow penalties (so you stop re-clogging)
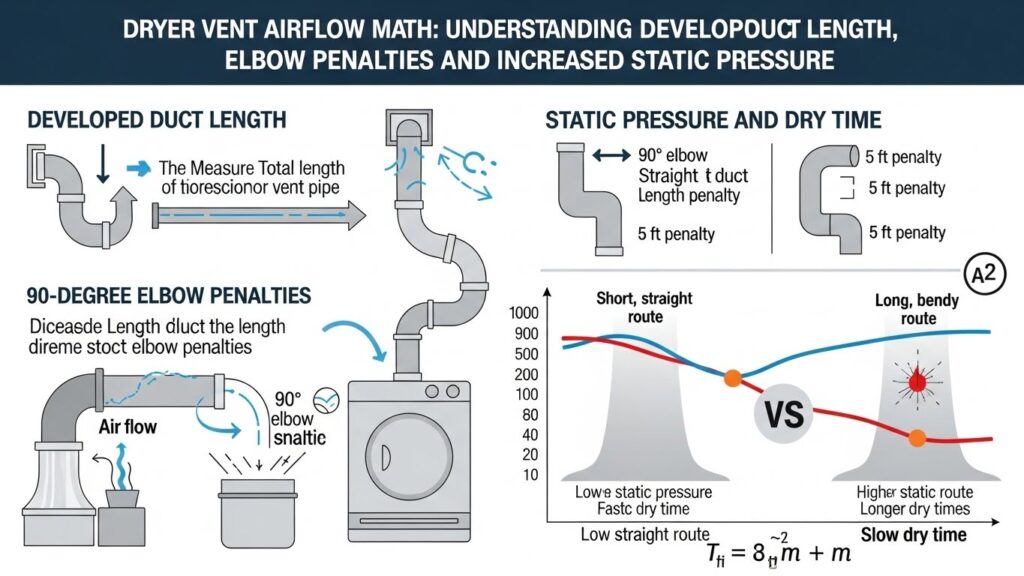
“Vent length” isn’t just the straight line distance. It’s the developed length: straight duct plus the resistance added by elbows and turns. Many guidelines use a baseline like 35 ft for 4-inch rigid metal duct, then subtract allowance for bends. Always check your dryer’s installation manual—it’s the rule that matters most.
Simple formula you can actually use
Effective Length ≈ Straight Feet + (90° Elbows × 5 ft) + (45° Elbows × 2.5 ft) If your straight run is 25 ft and you have three 90° elbows, you’re effectively around 40 ft—often beyond common baseline limits.
| What makes long dry times worse | Why it matters | Better option |
|---|---|---|
| Multiple tight elbows | Adds static pressure; lint drops out sooner | Fewer turns, long-sweep elbows if possible |
| Sagging flex duct | Creates low spots where lint collects | Short semi-rigid metal, supported and smooth |
| Roof termination | Vertical runs can be tough on airflow | Shorter wall route (when feasible) or booster fan eval |
| Fine mesh “pest screens” | Acts like a lint filter and chokes airflow | Proper hood with a free-moving flap |
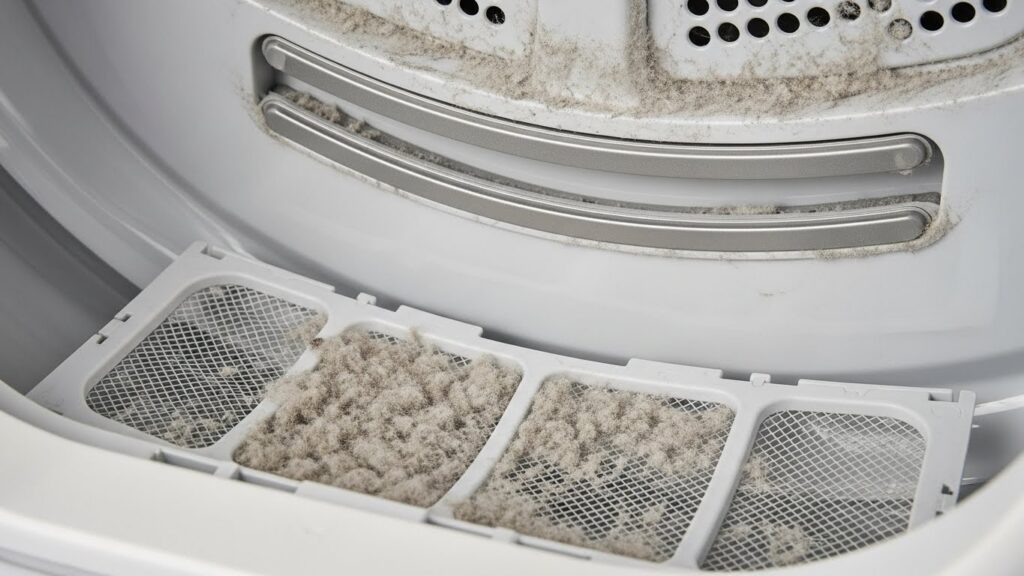
4) Deep clean: the hidden choke points (where airflow dies quietly)
Even if the lint screen looks clean, lint can build up below the screen in the housing, and that buildup reduces the “push” power of the blower. This is where people get stuck: they clean the easy parts, but the dryer still takes too long to dry.
Safe deep-clean checklist (no hero moves)
- Lint screen + frame: vacuum the slot and the frame area, not just the screen.
- Lint screen film test: run water over the screen. If it beads, wash the screen gently (residue blocks airflow).
- Vent connection points: disconnect and vacuum visible lint at the dryer outlet and the wall/duct inlet.
- Long or hidden runs: use a vent brush kit or hire a pro for in-wall/attic runs.
5) Sensors & settings: when “Sensor Dry” ends early (and you blame airflow)
Here’s the twist: sometimes airflow is fine, but the dryer thinks the load is already dry. Residue from dryer sheets and softeners can coat the moisture sensor strips, making Sensor Dry stop too soon. If your dryer dries fine on Timed Dry but struggles on Sensor Dry, this section is for you.
- Wipe moisture sensor strips: locate the two metal strips (often near the lint filter area) and wipe with rubbing alcohol on a cloth. Let dry.
- Clean lint screen film: if water beads on the screen, wash it gently with warm water and a soft brush, then fully dry.
- Retest with a consistent load: same fabric type, similar weight. Mixed loads (towels + synthetics) can confuse sensors.
Brand-specific clues (if your model has them)
- LG (Flow Sense): some models show restriction warnings (example codes like d80/d90). Treat it as “airflow proof,” then clean/reroute.
- Samsung (Vent Sensor / Vent Block icon): may flag poor airflow based on temperature/exhaust behavior.
- Whirlpool/Maytag (Check Vent): some models keep a check indicator until airflow improves and the unit is reset/cleared per the manual.
Note: indicators and codes vary by model. Use your manual as the final reference.
6) Long-run solutions: reroute vs booster fan (the “attic route” problem)
If your vent is long (attic runs, multiple elbows, roof termination), you can clean it and still struggle. At some point, the route itself becomes the problem. That’s when you decide between: shorter/straighter routing or a properly installed booster fan (when allowed and appropriate).
| Situation | Best direction | Why |
|---|---|---|
| Short run, weak airflow outside | Clean hood + fix crushed duct | Usually a quick restriction, not a “bad dryer” |
| Long run near limit + frequent lint buildup | Reroute shorter/straighter if possible | Reduces static pressure and repeat clogs |
| Vertical/roof run you can’t change | Booster fan evaluation (pro) | Some setups need mechanical help to maintain airflow |
| Vent terminates in attic/crawlspace | Stop and correct routing | Moisture damage risk (structure + mold) |
Hard stop warning: the “attic trap”
If your dryer vent dumps into an attic, crawlspace, or garage instead of outdoors, treat it as a routing emergency. A dryer can push gallons of moisture into building cavities over time. This is bigger than long dry times.
7) Diagnostic matrix + decision table (airflow vs hardware)
| What you see | Most likely | Best first move | DIY risk |
|---|---|---|---|
| Dryer is warm; clothes still damp | Restricted venting / static pressure | Outside hood check + transition duct inspection | Low |
| Timed Dry works, Sensor Dry quits early | Dirty moisture sensors / residue film | Clean sensor strips + lint screen film test | Low |
| Outside flap barely moves | Blocked hood / kinked duct / long run | Clear hood + straighten/shorten where possible | Low |
| Burning smell, scorching, repeated trips | Overheating risk / serious lint buildup | Stop, unplug, inspect or service | High |
Decision rule (simple and reliable)
- Weak airflow outside → fix venting first (clean/straighten/reroute).
- Strong airflow outside + still long dry → look at sensors (Sensor Dry) or heating diagnosis next.
- Any burning/scorching → stop and treat as safety issue, not performance tuning.
Common mistakes (that waste money) + pro tips
- Replacing the dryer first: a new dryer fails the same way on a bad vent path.
- Long accordion-style flex duct: turbulence + lint traps + sags = repeat clogs.
- Mesh screens on the hood: they “stop pests” but become a lint filter (and a choke point).
- Pushing the dryer tight to the wall: a crushed transition duct is basically an airflow clamp.
Pro tip
After every change, rerun the same simple proof: outside hood airflow. The hood doesn’t care about guesses—it shows whether your fix worked.
FAQ
Why does my dryer take two or three cycles to dry?
The most common reason is restricted exhaust airflow. Heat is present, but moist air can’t exit fast enough—so drying stalls. Start at the outside hood and work backward.
What’s the fastest way to tell if my vent is clogged?
Run the dryer briefly and check the outside vent hood. Weak airflow or a flap that barely opens is a strong restriction clue.
How long can a dryer vent be before it causes problems?
Many resources reference a developed length baseline (often around 35 ft for rigid 4″ duct) with reductions for elbows, but the best answer is: follow your dryer’s installation instructions and local code. Long, bendy routes usually cause trouble sooner.
Do dryer sheets cause long dry times?
They can contribute indirectly by leaving residue on the lint screen and moisture sensor strips over time. If water beads on the lint screen, wash it gently and let it dry fully.
My dryer is hot but the laundry is still damp—does that mean the heater is fine?
Often yes, but not always. That’s why the outside airflow check is so useful: strong exhaust + poor drying points more toward heat/sensor/mechanical issues; weak exhaust points to venting.
How often should I clean the dryer vent?
If dry times get longer, treat it as “clean now.” Otherwise, follow manufacturer guidance and your household reality (pets, heavy use, long runs). The outside hood check is a great habit because it reveals problems early.
Internal Links
- https://homefixatlas.com/laundry-comes-out-damp — If clothes leave the washer too wet, any dryer will feel slow
- https://homefixatlas.com/dryer-not-heating-2 — Use this if airflow looks strong but the dryer never truly warms up
- https://homefixatlas.com/dryer-making-loud-noises — Mechanical drag (rollers/blower issues) can lengthen dry times and add heat stress
Sources & References
- Whirlpool Product Help: Dryer is not Drying or Experiencing Long Dry Times
- PNNL Building America: Proper Clothes Dryer Venting
- U.S. Fire Administration: Clothes Dryer Fire Safety
Professional safety note
This guide is informational and focuses on safe airflow checks and venting best practices. If you smell burning, see scorching, experience repeated breaker trips, hear harsh scraping, or have any gas odor concerns, stop using the dryer and consult a qualified professional.
Update log: 2026-01-21 — Merged airflow-first protocol with sensor diagnostics, added developed-length math, upgraded the decision matrix, and expanded safety/reroute guidance for long attic/roof runs.

I publish step-by-step troubleshooting guides for common home appliance issues (washer, dryer, refrigerator, HVAC basics).
Content is written for everyday homeowners and cross-checked with manufacturer manuals, safety guidance, and trusted public resources.
Posts include practical checks, clear stop-signs for safety, and guidance on when it’s better to call a qualified technician. Updates are logged whenever steps or recommendations change.
Safety note: If you smell gas, see burning, or suspect electrical hazards—stop immediately and contact a qualified professional.