Dryer drum not turning? Don’t guess the motor. Prove the drum can spin, then prove the belt has tension.
Most “no tumble” situations trace back to a broken/slipping belt, a seized idler pulley, or a drum that can’t spin freely (rollers/glides/bearing drag). This one-page guide walks you through the safest order: hand-spin → sound check → belt tension → idler free-spin → binding points → next steps.
Key number #1 Many electric dryers use 240V (North America). Treat internal wiring as high-risk.
Key number #2 A “closed” safety switch path often reads roughly 0–1Ω in continuity mode (model varies).
Key number #3 Wait 10–15 minutes after unplugging before touching internal parts (heat + stored energy).
Why this page exists
- “No tumble” looks like a big failure, but the root cause is often the belt path or drum supports.
- Replacing only the belt can fail again if the idler pulley or rollers/glides are rough.
- You’ll leave with a clear answer: belt/tension vs binding/support wear vs start-permission.
⚠️ Safety first (read before opening anything)
- Unplug the dryer before moving it or removing panels. Assume terminals can be hazardous.
- Never run the dryer with access panels removed. Keep hands, hair, clothing, and tools away from moving parts.
- Stop and get qualified help if you smell burning, see scorching, the cord/outlet feels hot, or breakers trip repeatedly.
- For gas dryers: any gas odor is an immediate safety situation—ventilate and contact a professional.
Updated: 2026-01-25 • One-page plan: hand-spin → sound check → belt tension → idler free-spin → binding points → safe next steps
When a dryer won’t tumble, most people jump straight to “dead motor.” In practice, the drum often stops because the belt can’t transfer motion (broken belt, slipping belt, seized idler) or because the drum is dragging hard (rollers/glides/bearing wear or a jam). The fastest way to avoid wasting money is to prove what’s happening with low-risk tests first—before you order parts or tear the machine apart.
This page is designed so a visitor can get nearly everything in one place: the “why,” the safe diagnostic flow, a symptom matrix, and the point where DIY should stop. If you only do one thing, do the hand-spin test. It quickly separates belt/tension problems from binding/support problems.
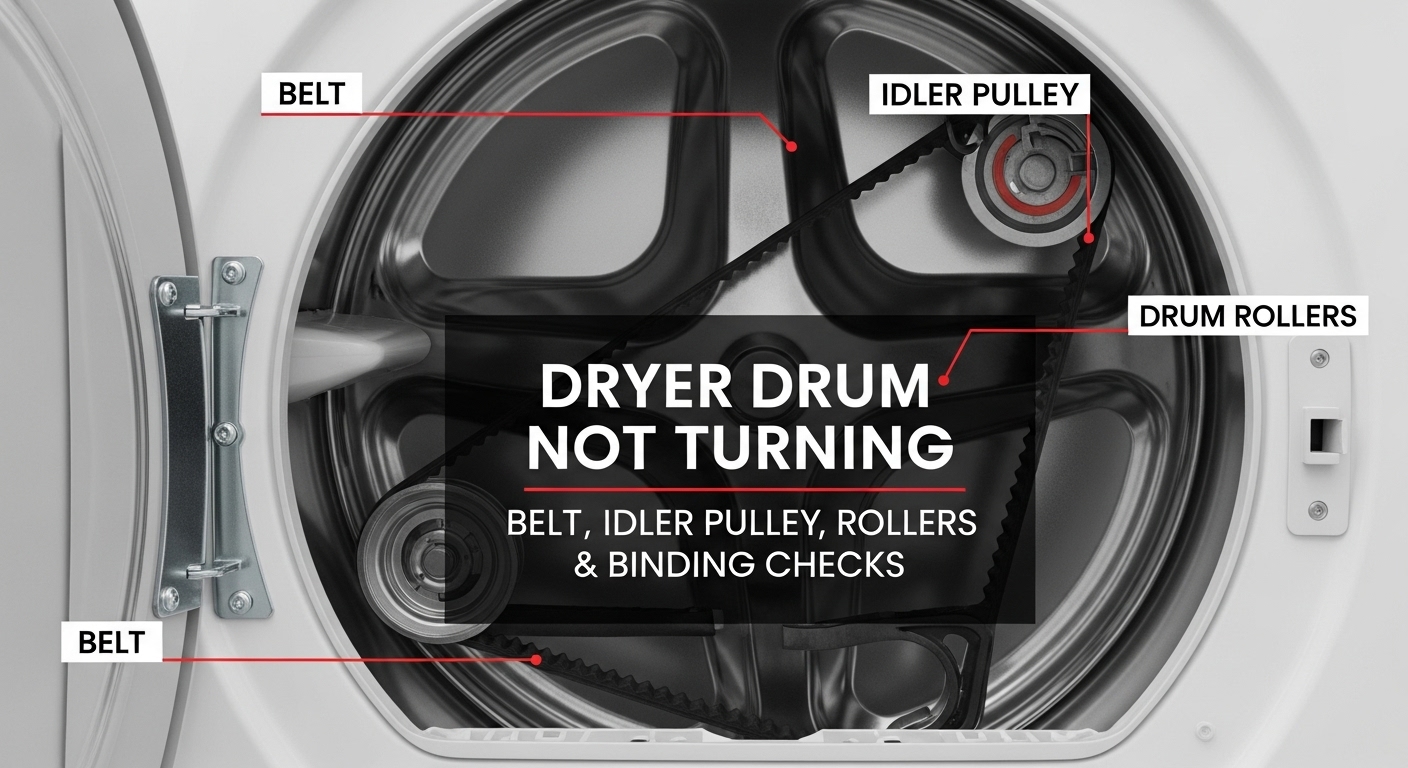
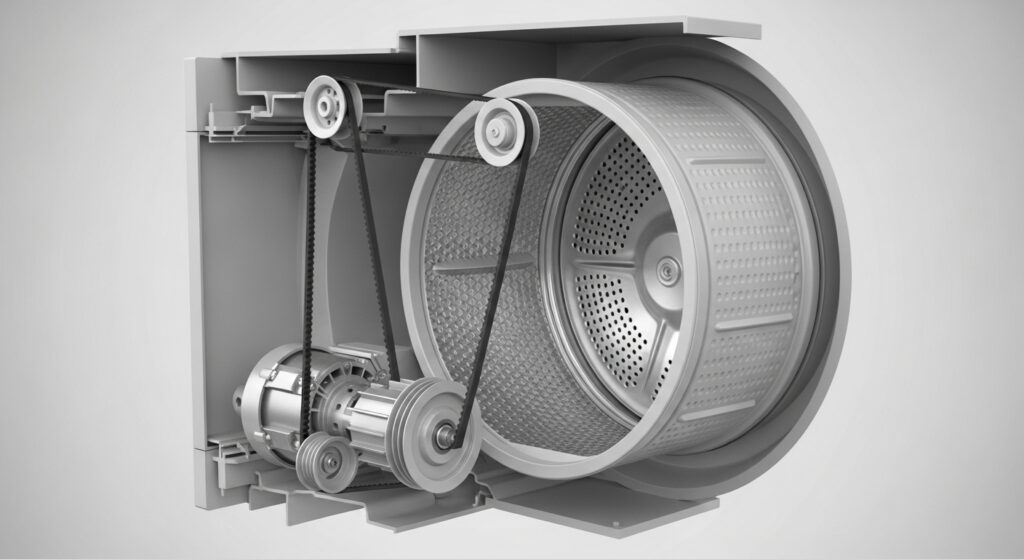
How tumbling works (plain-English model)
Think of your dryer as a simple chain: motor → belt → drum. The belt wraps around the drum like a big loop. The idler pulley pushes on the belt to keep tension so it doesn’t slip. The drum rides on rollers/glides (and often a rear bearing) so it can spin smoothly.
| Part | Job | What failure often looks like |
|---|---|---|
| Drive belt | Transfers motor rotation to drum | Drum won’t tumble; drum may feel unusually “free” by hand; sometimes a faint motor hum. |
| Idler pulley | Maintains belt tension | Squeal/grind; belt dust; belt slips or gets chewed; idler feels rough/stuck when spun by hand. |
| Drum rollers / glides | Support drum rotation | Thumping, scraping, “lumpy” rotation; drum hard to turn; wear builds over weeks. |
| Rear drum bearing | Stabilizes rear of drum | Roar/scrape; heavy drag; drum slows/stalls mid-cycle; sometimes metal-on-metal sound. |
| Blower wheel area | Moves hot air + lint | Obstruction can strain motor; lint buildup raises heat stress and fire risk patterns. |
Priority protocol (5 steps, safest order)
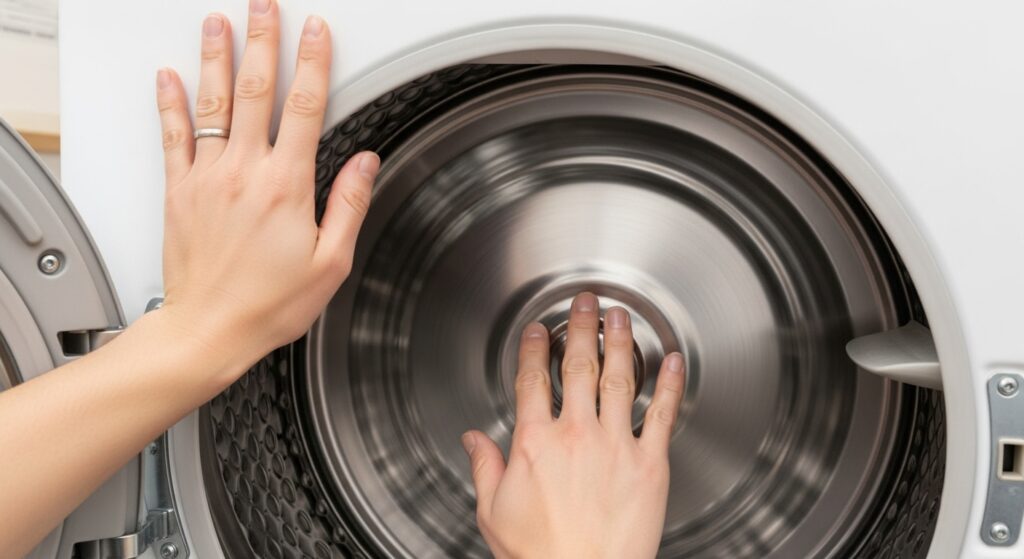
- Step 1 — Hand-spin test (no tools):
Unplug the dryer. Open the door and rotate the drum by hand (as much as your model allows). You want steady, smooth resistance.
If it feels extremely free, suspect a belt/tension problem.
If it feels heavy, gritty, catches, or thumps, that’s a binding/support signal—don’t force it. - Step 2 — Quick sound check (short + controlled):
Plug in, pick a timed cycle, press Start, listen for 2–5 seconds, then stop.
• Motor runs/hums but drum doesn’t move: belt break/slip, idler issue, or severe drag.
• Silence or instant stop: start-permission (door switch, belt switch, control) may be involved. - Step 3 — Airflow & lint check (protects the next repair):
Clean the lint screen. Vacuum visible lint at the opening. Confirm outdoor vent airflow is strong when the dryer runs normally.
This doesn’t “fix” a broken belt, but it reduces heat stress and lowers dryer-fire risk patterns. - Step 4 — If trained & safe: prove belt tension + idler free-spin:
Unplug, cool down, then inspect the belt for breaks and correct routing (if you know safe panel removal).
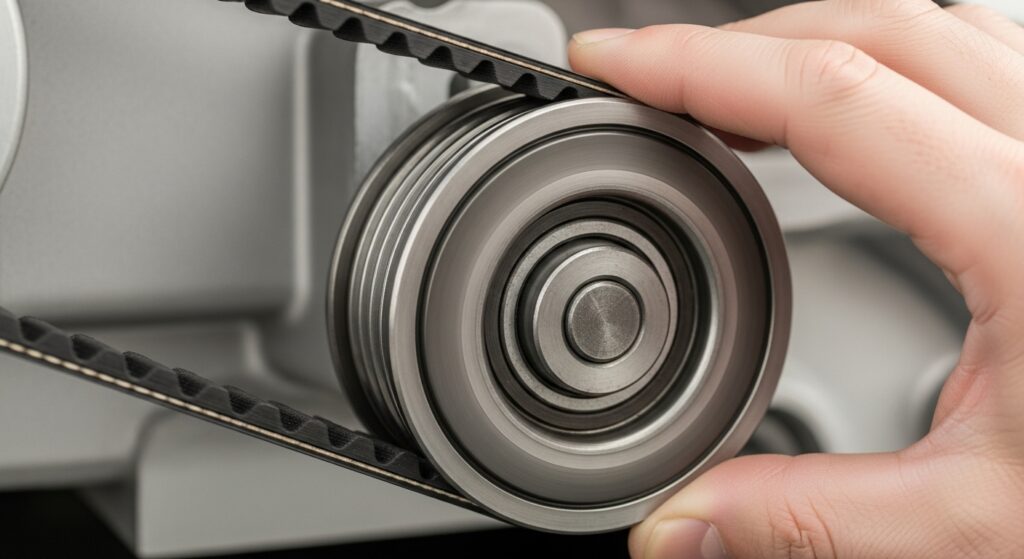
Spin the idler pulley by hand: it should turn smoothly and quietly. Roughness, wobble, or a stuck pulley is a replace signal. - Step 5 — Find binding points (rollers, glides, bearing, jams):
If the belt is intact but the drum is hard to rotate, focus on drum supports and friction points.
Flat-spotted rollers, worn glides, a failing rear bearing, or a foreign object can create drag that stalls the system.
Pro tip (prevents repeat failure)
If you replace the belt, don’t stop there. Do a quick idler free-spin check and feel for drum drag. A rough idler or dragging roller can chew up a new belt and overload the motor.
Diagnostic matrix (what you notice → best next move)
| What you notice | Most likely bucket | Best first move | Safety note |
|---|---|---|---|
| Motor runs/hums, drum doesn’t move | Belt broken/slipping, idler issue, or severe drag | Hand-spin → belt tension → idler free-spin | Stop if you smell heat/burning. |
| Drum is very hard to rotate by hand | Binding supports (rollers/glides/bearing) or obstruction | Don’t force; locate drag points or get service help | Higher risk of motor strain. |
| Loud squeal before it stopped tumbling | Idler pulley / belt tension problem | Inspect idler for rough spin, wobble, belt wear | Unplug and allow cool-down. |
| Thumping/scraping got worse over weeks | Roller/glide/bearing wear building up | Plan support inspection before it fully jams | Stop if noise spikes suddenly. |
| Outlet/cord hot or electrical smell | Electrical hazard | Unplug and get qualified help | Stop now. |
Timing plan (what to do in the next hour)
| Time window | Do this | Why it matters |
|---|---|---|
| 0–10 minutes | Hand-spin test + short sound check | Separates belt/tension vs binding quickly without opening the machine |
| 10–25 minutes | Lint screen + visible lint cleanup + vent airflow awareness | Reduces heat stress and lowers dryer-fire risk patterns |
| 25–60 minutes | If trained: inspect belt routing, idler free-spin, and obvious support wear | Confirms the mechanical failure point before buying parts |
Common mistakes (and why they backfire)
- Assuming “no tumble” = motor failure. The belt path and supports fail far more often and are cheaper to address.
- Replacing only the belt. A rough idler pulley or dragging roller can destroy a new belt quickly.
- Forcing a binding drum. If it’s stuck, forcing it can damage the belt path, motor, or supports.
- Ignoring lint/vent restriction. Heat stress and lint buildup shorten component life and increase fire risk patterns.
A common timeline: the dryer got louder or slower over time, then the drum finally stopped. That pattern fits support wear more than a sudden electrical mystery.
Serious cases (stop and call service)
Stop if you smell burning, see scorch marks, feel a hot outlet/cord, keep tripping breakers, or the drum is severely jammed. For gas dryers, any gas odor is an immediate safety issue—ventilate and contact qualified help.
FAQ
Can the dryer “sound normal” if the belt is broken?
Sometimes. The panel may look normal and you may hear the motor, but the drum won’t move because the belt can’t transfer motion. That’s why the hand-spin test is step one.
What does a seized idler pulley feel like?
If you can access it safely (unplugged), it won’t spin freely or feels gritty/rough. That roughness can shred belts and overload the motor.
My drum is hard to turn by hand—what does that mean?
That’s a binding signal. Rollers/glides/bearing wear or an obstruction is resisting rotation. Don’t force it—find the drag cause or have a pro inspect it.
Why include venting in a “no tumble” guide?
Vent restriction and lint buildup increase heat stress, extend dry times, and raise dryer-fire risk patterns. Even after a belt/idler fix, airflow helps prevent repeat failures.
Is it safe to run the dryer “just once” if the drum isn’t turning?
Not recommended. Abnormal load conditions can overheat components and worsen damage. Diagnose first instead of hoping it clears.
When should I stop DIY?
Stop if the drum is jammed hard, you notice electrical heat/burning odor, breakers trip, you smell gas (gas models), or you’re not confident in safe disassembly and reassembly.
Internal Links
- https://homefixatlas.com/dryer-making-loud-noises/ — Sound-to-part map for squeals, thumps, and scraping.
- https://homefixatlas.com/laundry-comes-out-damp — Airflow checks and why dry times got worse before failure.
- https://homefixatlas.com/dryer-not-heating-2/ — If tumbling is fine but heat is missing, use this safer path.
References
- Massachusetts.gov — Dryer fire safety (lint + vent maintenance guidance)
- NFPA — Clothes dryer safety tips (PDF)
Safety notice
This article is informational and prioritizes safer external checks first. Internal disassembly and electrical testing can be hazardous even for experienced DIYers. If you suspect electrical overheating, smell burning, feel a hot outlet/cord, notice gas odor, or the drum is severely jammed, stop use and contact a qualified professional.
Update log: 2026-01-25 — Cleaned formatting, strengthened “binding-first” pathway, tightened safety language, and standardized internal link summaries.

I publish step-by-step troubleshooting guides for common home appliance issues (washer, dryer, refrigerator, HVAC basics).
Content is written for everyday homeowners and cross-checked with manufacturer manuals, safety guidance, and trusted public resources.
Posts include practical checks, clear stop-signs for safety, and guidance on when it’s better to call a qualified technician. Updates are logged whenever steps or recommendations change.
Safety note: If you smell gas, see burning, or suspect electrical hazards—stop immediately and contact a qualified professional.