Freezer making a loud humming noise? Do the 60-second “door-change + location” test first.
Open the freezer door and listen: if the hum changes or drops fast, you’re usually in the evaporator fan / ice rubbing bucket. If it stays loud and seems to come from behind the unit, think condenser fan or compressor load. This guide helps you prove the source before you touch parts or pay for a visit.
Fast resultMost “suddenly loud” humming is fan friction (ice/debris) or restricted airflow, not a dead compressor.
Key numberFood safety baseline: keep the freezer at 0°F / −18°C or below (a cheap thermometer beats guessing).
Low-risk toolsFlashlight + vacuum/brush + towel. Skip screwdrivers until you’ve isolated the zone.
One decision path (no guessing)
- Door opens → sound changes: evaporator fan / ice / airflow inside.
- Door opens → sound unchanged, loudest behind: condenser fan / compressor load.
- Press cabinet / move 2 inches: resonance (easy win).
- Hum + clicking + warming temps: stop “testing” and move to service/replace decision.
⚠️ Safety first (avoid the expensive mistake)
- Unplug first before pulling the unit out or removing any rear/bottom cover.
- Never chip ice with knives/screwdrivers near coils. A puncture can end the appliance.
- Stop immediately if you smell burning, see melted plastic, notice a hot outlet/cord, or breakers trip repeatedly.
Updated: 2026-01-27 • Engineering Insight: sound travels through cabinets, so you need a test—not a guess.
A freezer can sound “broken” even when it’s cooling perfectly—because the cabinet acts like a speaker box. A tiny fan rub or a little extra compressor load can turn into a loud hum that feels scary at night. Let’s do this the technician way: prove the source zone, then apply the safest fixes first.
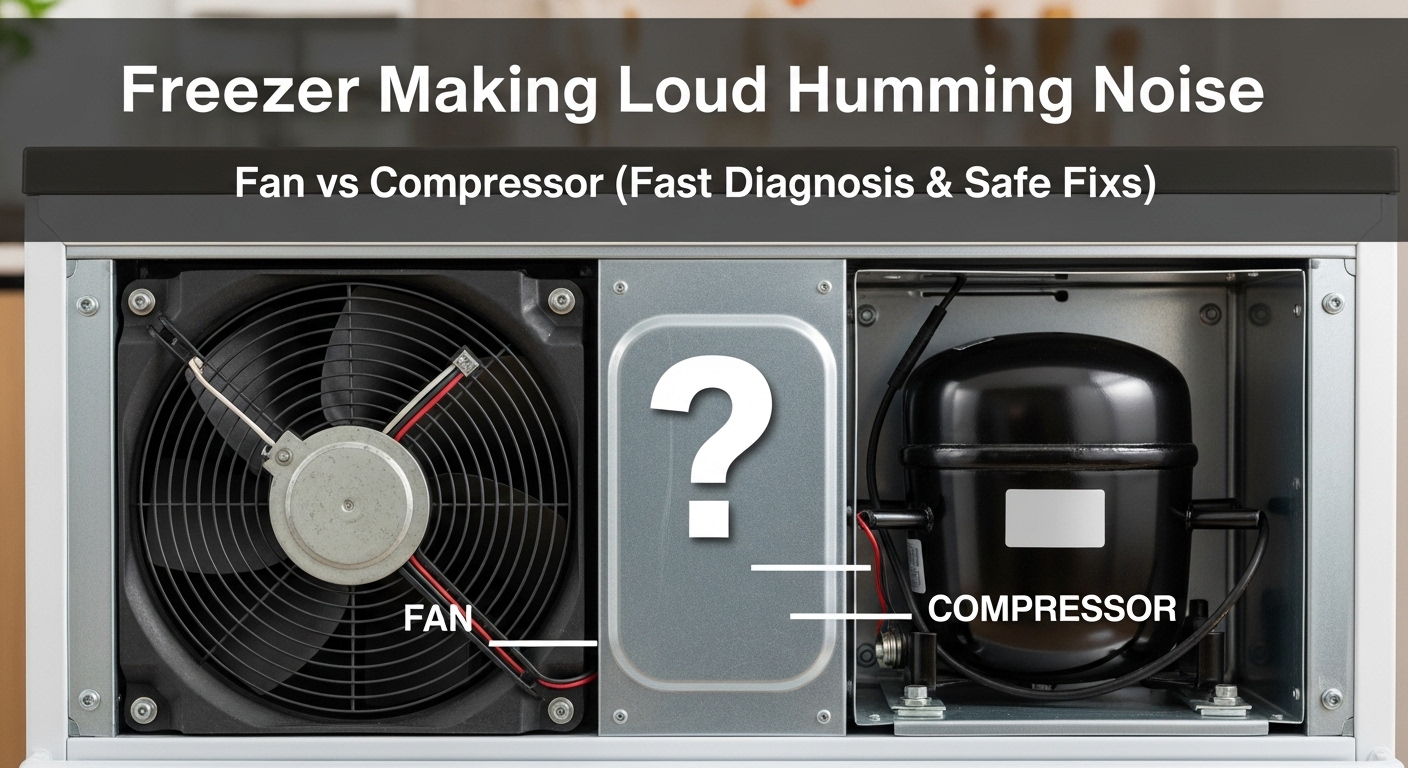
What “humming” usually means (plain-English sound model)
Most loud humming comes from one of three engines: (1) the evaporator fan inside (moves cold air), (2) the condenser fan near the back/bottom (pushes heat out), or (3) the compressor (sealed system motor). The fix depends on where you hear it and whether the sound changes when airflow changes.
| Source | Where it feels loudest | “Sound fingerprint” | Best first check |
|---|---|---|---|
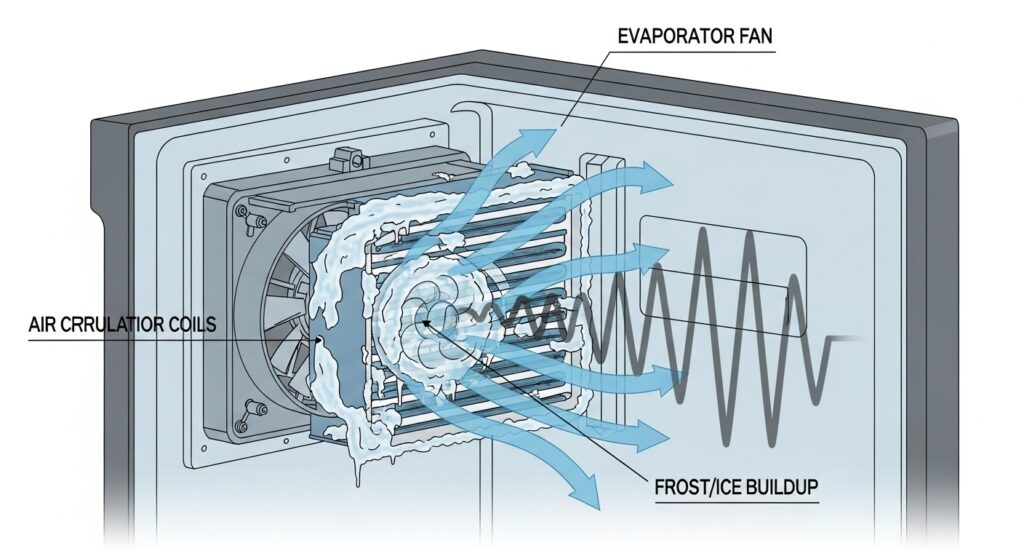
| Evaporator fan | Inside freezer, back wall area | Hum/whir that changes with door open; may turn into a “card-in-spokes” scrape | Door-change test + look for back-wall frost |
| Condenser fan | Behind unit, bottom area | Steady hum + occasional rattle; louder with lint/dust load | Unplug → pull out → check lint/debris + clearance |
| Compressor (normal load) | Behind unit, low center | Low pitch hum that comes and goes with run cycles | Clean coils + confirm door seals + wait 20–40 min |
| Compressor (abnormal) | Behind unit, with symptoms | Hum + repeated clicking, overheating, warming temps | Stop cycling power → service/replace decision path |
The 5-step precision fix protocol (safest order, highest payoff)
- Step 1 — Door-change test (30 seconds):
Listen, then open the freezer door.
If the humming changes noticeably (drops, stops, or shifts tone), you’re very likely dealing with airflow / evaporator fan behavior. That’s good news—often fixable without parts. - Step 2 — Location test (1 minute):
Compare two zones: (A) inside freezer back wall vs (B) behind unit near the bottom.
Inside-back loud = fan/ice inside. Behind-bottom loud = condenser fan or compressor load. This single minute prevents random part swapping. - Step 3 — The “ice signature” check (no tools):
Look for thick frost on the freezer back wall, vents blocked by frozen packages, or a new “scrape” layer in the hum.
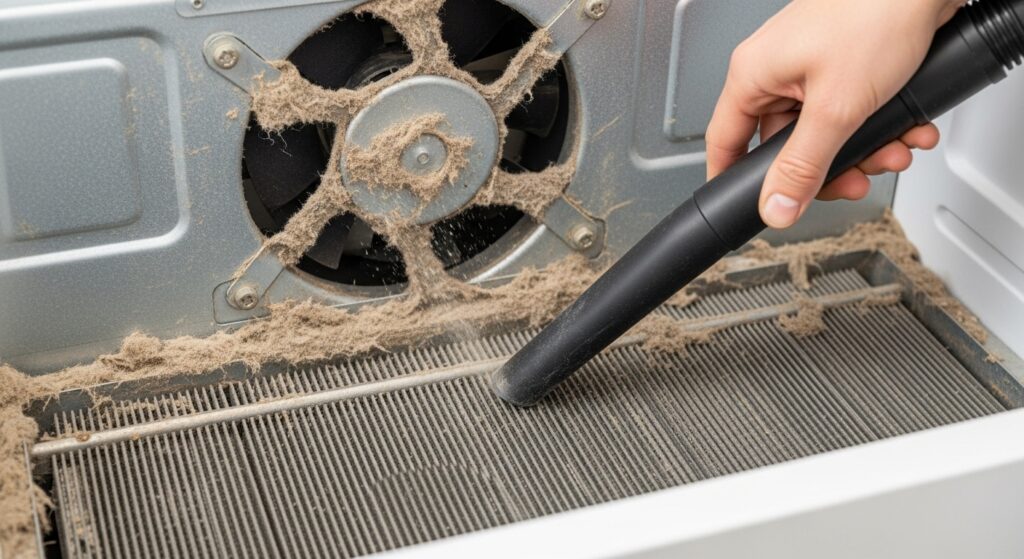
Quick fixes that are safe: move food away from vents, avoid packing against the back wall, and confirm the door closes without pushing food forward. - Step 4 — Reduce compressor strain (clean + clearance):
Unplug, pull the unit out, and remove lint/dust from the back/bottom intake area (especially with pets).
Then give the unit a small gap from the wall (even 2 inches helps). Less heat trapped = less load = less humming. - Step 5 — If fan-to-ice rubbing is likely: do a controlled manual defrost (safest confirm + fix):
Power off, doors open, towels down. Let ice melt naturally.
Do not chip ice and avoid high heat near plastic liners.
If the loud hum returns quickly (within days), that points to a repeat cause (air leak, door seal, defrost system issue) rather than a one-time event.
Pro tip (cuts repeat hum)
If you see frost patterns repeatedly, treat it like a humidity problem: clear vents, avoid overpacking the back wall, and check the door seal. Humid air sneaking in = frost = fan rubbing again.
Diagnostic matrix (what you notice → best next move)
| What you notice | Most likely bucket | Best first move | Stop point |
|---|---|---|---|
| Hum changes when door opens | Evaporator fan / airflow | Check back-wall frost + vents → consider manual defrost | If temps rise, escalate. |
| Hum loudest behind the unit | Condenser fan or compressor load | Unplug → clean lint/dust → improve clearance | Hot cord/outlet = stop. |
| Hum + thick frost on freezer back wall | Fan rubbing ice / defrost-related | Manual defrost + check gasket sealing | Fast return = service likely. |
| Hum after restocking / hot day | Normal heavy load | Give it 2–6 hours + keep vents unblocked | If temps drift up, act. |
| Loud hum + repeated clicking + poor cooling | Compressor start/load problem | Stop cycling power; plan service | Do not keep testing. |
If it’s “resonance hum” (the easiest win)
Sometimes the freezer is fine—but it’s touching something that turns normal vibration into a loud cabinet hum. Try these quick checks:
- Pull it 2 inches from the wall. Contact with drywall can amplify vibration dramatically.
- Check the feet. A slightly unlevel unit can rattle or resonate under load.
- Look for touch points. A loose back panel, drain pan, or line touching metal can “sing.”
Repair vs replace (simple rule that saves money)
Use the “50% rule”: if a confirmed repair is more than half the price of a similar new unit, replacement is often the smarter move—especially on older appliances. Fan-related fixes usually make sense. Compressor/sealed-system issues usually don’t.
| Component | Typical DIY parts range | Smart verdict |
|---|---|---|
| Evaporator fan motor | $30–$120 | Fix. High ROI if you’ve proven fan noise. |
| Condenser fan motor | $40–$150 | Fix. Often paired with coil cleaning. |
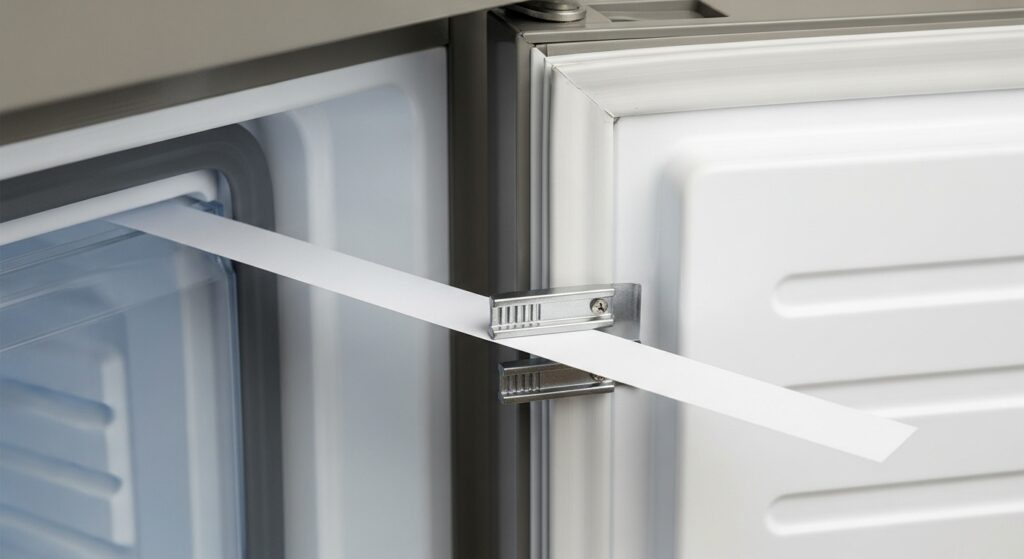
| Door gasket | $50–$160 | Fix if frost keeps returning quickly. |
| Compressor / sealed system | Pro repair often $500+ | Replace if the unit is older or value is low. |
Stop DIY and call service if:
The humming is paired with repeated clicking, the freezer won’t hold 0°F / −18°C, breakers trip, or you smell burning. Those are not “trial-and-error” situations.
Common mistakes that make humming worse
- Chipping ice with sharp tools. High risk of coil/liner damage.
- Overpacking the back wall. Blocks vents and increases frost/load.
- Zero clearance from the wall. Traps heat and amplifies vibration.
- Power-cycling repeatedly. If there’s clicking + warming temps, constant restarts can make things worse.
FAQ
Is a humming freezer always a bad sign?
Not always. A steady hum can be normal during a run cycle. The bigger signal is a sudden change—especially if it comes with frost buildup, warming temps, or clicking.
Why does it sound louder at night?
Your house is quieter, so the same sound feels bigger. Also, evening cooking and door openings can increase run time. If it’s truly louder than normal, check airflow (lint/clearance) and frost.
If the noise changes when I open the door, what does that prove?
It strongly suggests the noise involves internal airflow or the evaporator fan. That’s usually easier to address than compressor problems.
How long should I wait after cleaning coils before judging noise?
Give it 20–40 minutes of normal operation. Load-related humming often reduces as the system stabilizes and heat rejection improves.
Can I use a hair dryer to melt ice near the fan?
It’s safer to avoid high heat near plastic liners and hidden components. A controlled manual defrost is slower, but it’s the lowest-risk approach.
What’s the clearest sign I should stop and call a pro?
Humming + repeated clicking + poor cooling, electrical overheating smells, hot outlets/cords, or breaker trips. That’s beyond safe basic checks.
Internal Links
- https://homefixatlas.com/freezer-frost-build-up/ — Frost patterns and air leaks that explain why fans start rubbing ice.
- https://homefixatlas.com/refrigerator-making-clicking-or-buzzing-noises/ — If humming is paired with clicking, this helps decode warning patterns.
- https://homefixatlas.com/refrigerator-runs-constantly/ — Constant run time often means airflow/load issues that also increase humming.
Sources & References
- FoodSafety.gov — Cold food storage charts (0°F / −18°C guidance)
- GE Appliances — Why a freezer/refrigerator may make noise
- Whirlpool — Freezer troubleshooting basics (airflow/ice checks)
Professional safety note
This guide is informational and prioritizes low-risk checks. Moving appliances and accessing panels can be hazardous. If you suspect electrical problems, overheating, or cooling failure, disconnect power and contact a qualified technician.
Update log: 2026-01-27 — Unified the best elements (fast decision tests + matrices + resonance fixes), improved “stop points,” and added repair-vs-replace guidance for higher trust.

I publish step-by-step troubleshooting guides for common home appliance issues (washer, dryer, refrigerator, HVAC basics).
Content is written for everyday homeowners and cross-checked with manufacturer manuals, safety guidance, and trusted public resources.
Posts include practical checks, clear stop-signs for safety, and guidance on when it’s better to call a qualified technician. Updates are logged whenever steps or recommendations change.
Safety note: If you smell gas, see burning, or suspect electrical hazards—stop immediately and contact a qualified professional.