Freezer making loud humming noise? Don’t jump to “compressor failure.” Prove the noise zone first—most loud hums are fan/ice rub or vibration amplification.
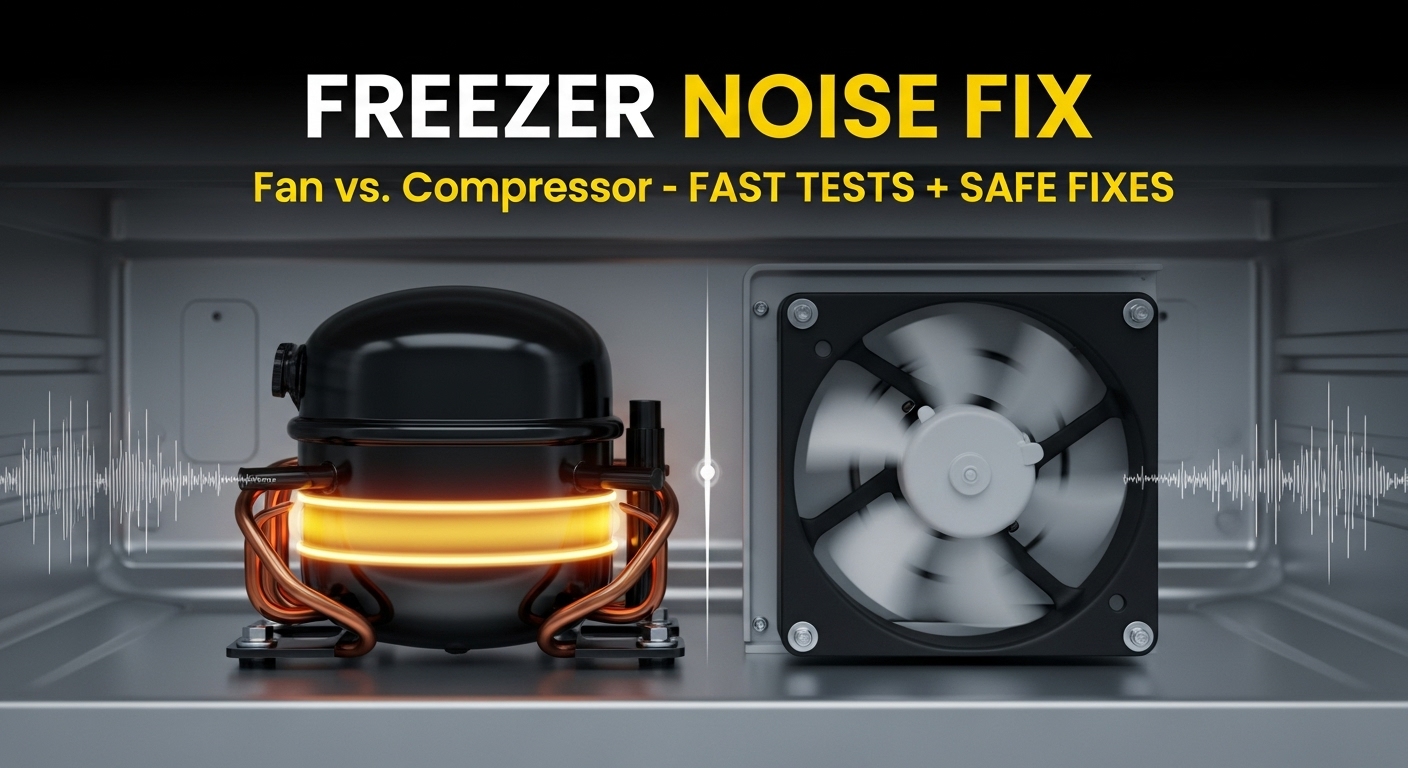
A freezer “hum” isn’t one sound. It usually comes from either inside (evaporator fan) or back/bottom (condenser fan + compressor vibration). This guide gives you a safe, fast test order so you stop guessing parts and start narrowing causes in minutes.
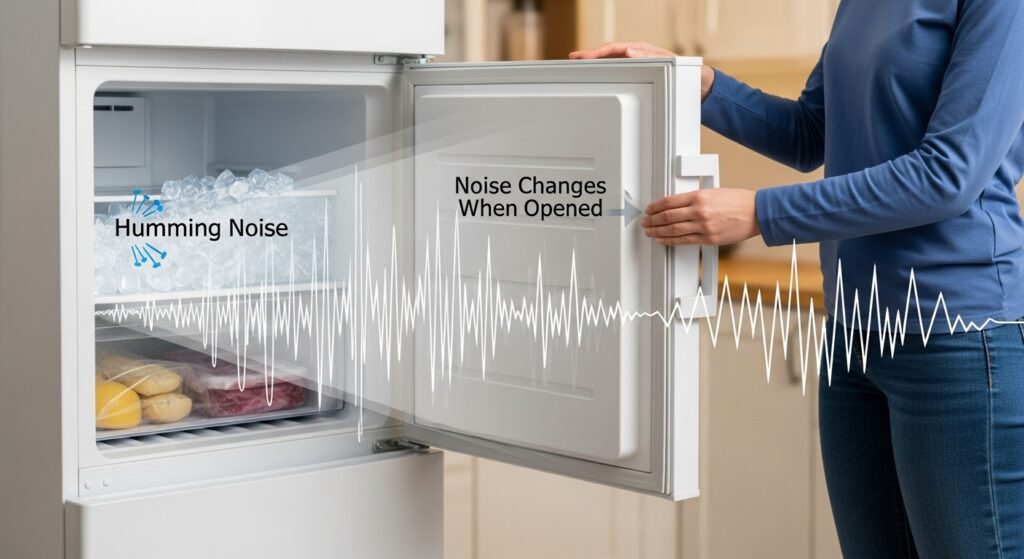
Fast test #1 (Door test)If the noise changes right when the door opens, suspect evaporator fan / ice rub.
Fast test #2 (Location test)Loudest inside → fan/ice. Loudest back/bottom → condenser fan, panels, or vibration.
Fast test #3 (Temperature check)Freezer target is commonly 0°F (-18°C). If temps rise while the hum worsens, treat it as urgent.
Snippet-ready summary
Freezer making loud humming noise is usually fan/ice rub or vibration amplification. Use the door test + location test to identify the zone, then follow safe steps for defrost, cleaning, leveling, and clearance—before calling service.
⚠️ Safety first (please read)
- Unplug the unit before moving it, removing any rear/bottom cover, or cleaning near fans/wiring.
- Never chip ice with knives or screwdrivers. A puncture can cause permanent damage.
- Stop and call a qualified pro if you smell burning, see scorching, feel a hot cord/outlet, hear harsh metal grinding, or breakers trip repeatedly.
Updated: 2026-01-26 • Quick path: door test → location test → ice-rub clues → back/bottom vibration checks → safe defrost/clean/level steps
A loud hum feels like a big-ticket problem—because it sounds like “the motor.” But in real life, a freezer can act like a speaker box: a normal vibration becomes loud when the cabinet touches a wall, a panel loosens, or a fan starts rubbing ice. The win is not “guess the part.” The win is: find the zone, then apply the safest fix for that zone.
On this page
- Normal hum vs problem hum (quick checklist)
- Zone map: inside vs back/bottom
- 5-step precision protocol (safest order)
- Safe defrost protocol (no tools)
- Vibration & resonance fixes (clearance + leveling)
- Diagnostic matrix (what the sound means)
- Repair economics: fix vs replace
- FAQ
Normal hum vs problem hum (quick checklist)
Before tools, do a 30-second reality check. Many modern freezers run more often at lower power to hold steady temperature. That can sound like a continuous “background hum.” What you’re looking for is a hum that’s new, louder than usual, or paired with temperature trouble.
Usually normal
- Steady low hum that doesn’t spike
- No rattling, no grinding
- Temperature stays stable
Usually fixable
- Hum gets louder near a wall/cabinet
- Buzz/rattle that changes with pressure on a panel
- Noise started after door was left open (humidity → frost)
Stop & call service
- Harsh metal grinding / screeching
- Burning smell, hot plug/outlet
- Temps rising quickly while noise worsens
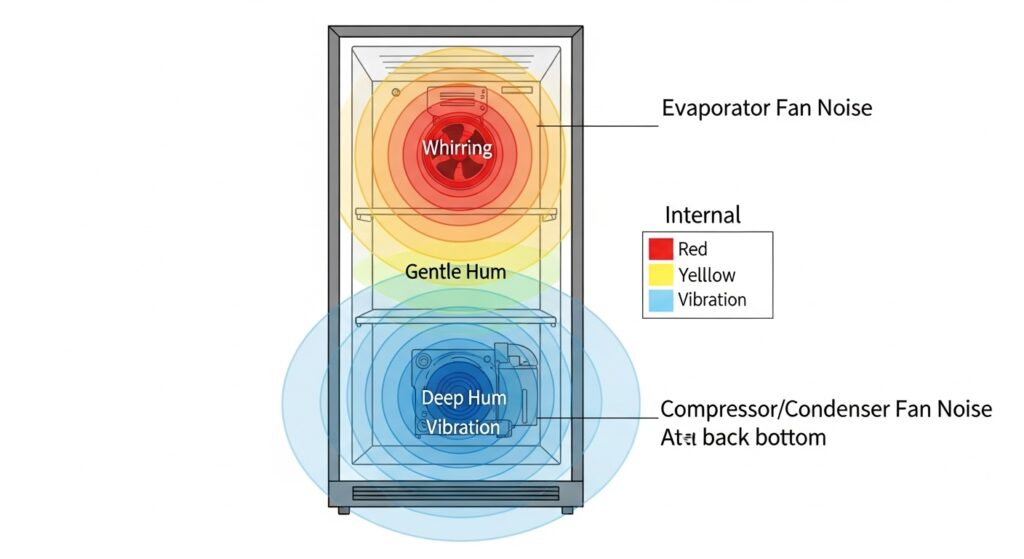
Zone map: inside vs back/bottom (the only “diagnosis” you need first)
Here’s the simple rule: fans make higher, faster hums. compressor vibration is deeper. But your ears need a map—because the cabinet can bounce sound around.
Quick “physics” you can actually use
Loud doesn’t always mean broken. Often it’s: Noise ≈ Vibration × Contact/Resonance Removing a touchpoint (wall contact) or leveling feet can drop noise dramatically—without replacing anything.
| Source | Where it’s loudest | What it often sounds like | Most useful first check |
|---|---|---|---|
| Evaporator fan | Inside freezer (rear wall area) | Fast hum/whirr, sometimes “buzz” | Door test + frost/ice clues |
| Ice rubbing fan/shroud | Inside freezer | Sudden louder hum, may come and go | Safe manual defrost (no tools) |
| Condenser fan / dust | Back/bottom | Hum + rattle, louder during run cycles | Unplug → pull out → dust + panel check |
| Compressor vibration / mounts | Back/bottom (deep hum) | Deep steady hum, cabinet may “buzz” | Leveling + remove wall/cabinet contact |
5-step precision protocol (safest order)
- Step 1 — Door test (15 seconds):
Listen with the door closed. Open the freezer door and listen again.
If the sound changes quickly, suspect evaporator fan/ice rub. If it doesn’t change, suspect back/bottom sources. - Step 2 — Location test (ear-to-surface):
Compare the sound: inside rear wall vs back/bottom outside.
Inside-loud = fan/ice rub. Back/bottom-loud = condenser fan, loose panels, drain pan rattle, or compressor vibration. - Step 3 — Ice-rub clues (no tools):
Look for heavy frost on the freezer back wall, vents, or a “started after door left open” timeline.
If yes, skip scraping. Go straight to the safe defrost protocol below. - Step 4 — Back/bottom amplification check (UNPLUG first):
Pull the unit out slightly, create clearance, and lightly press on any rear/bottom panel areas (after unplugged) to see if the rattle changes.
Wall contact + loose panels can make normal operation sound “serious.” - Step 5 — Choose the fix path (based on what you proved):
Fan/ice → safe defrost. Back/bottom vibration → cleaning + leveling + clearance + panel tightening.
If temperature is rising while the hum worsens, stop DIY and prioritize service/food safety.
Safe defrost protocol (no tools, no drama)
If the inside zone is loud and frost clues are present, the cleanest, lowest-risk move is a full, patient defrost. The goal isn’t “melt what you can see.” The goal is to clear hidden ice in ducts and around the fan shroud.
- Move food to a cooler (or another freezer) if needed.
- Unplug the unit and open the doors.
- Use towels to manage water. Place a shallow tray if possible.
- Wait until fully melted (often hours; sometimes longer if ice is inside ducts).
- Dry surfaces, plug back in, and monitor noise + temperature over the next several hours.
Avoid hair dryers near wiring and plastics. Avoid sharp tools entirely. The slow method is boring—but it’s the safe one.
Vibration & resonance fixes (the fastest “noise drop” wins)
If the noise is loudest at the back/bottom, you’re often dealing with vibration being amplified by contact points. Here are the fixes that routinely make the biggest difference—without opening sealed systems.
- Create clearance: ensure the unit isn’t touching the wall or cabinets. Even small contact can turn the cabinet into a speaker.
- Level the feet: stabilize all corners. An unstable corner can “drum” against the floor and amplify hum.
- Check the drain pan: a loose drain pan can rattle like a serious mechanical fault.
- Tighten loose panels: rear/bottom covers and nearby trim can buzz under normal vibration.

Diagnostic matrix: decoding the hum (what it usually means)
| What you notice | Most likely bucket | Best next move | Safety note |
|---|---|---|---|
| Hum changes when door opens | Evaporator fan / ice rub | Check frost clues → safe defrost | No sharp tools on ice |
| Loudest at back/bottom | Condenser fan, vibration, loose panel/drain pan | Unplug → pull out → dust + panel + wall contact check | Avoid touching wiring/fans |
| Buzz/rattle that changes when you press a panel | Resonance amplification | Tighten panel + add clearance + level feet | Small changes can be big |
| Noise louder AND temps rising | Cooling stress / frost airflow issues | Check frost pattern → serious-case decision | Food safety first |
| Burning smell / hot cord / breaker trips | Electrical hazard | Unplug and stop use → qualified service | Stop now |
Repair economics: fix vs replace (practical decision guide)
Noise alone doesn’t mean replacement—but costs can climb if the issue is in sealed-system territory. Use this as a sanity-check framework (real prices vary by model and region).
| Likely fix | Typical difficulty | Why it’s often worth trying first |
|---|---|---|
| Defrost (fan/ice rub) | Low | Safest “reset” that can remove hidden ice causing fan interference. |
| Clearance + leveling + tighten panels | Low | Resonance amplification can make a normal unit sound broken. |
| Clean condenser area | Low–Medium | Reduces run stress and can cut rattles near the bottom area. |
| Sealed-system/compressor work | Pro only | If confirmed, weigh repair cost vs unit age and overall condition. |
Common mistakes (and why they backfire)
- Jumping straight to “compressor is dying.” Many loud hum cases are fan/ice rub or vibration amplification.
- Opening the door repeatedly to “check.” It warms the freezer and forces longer run cycles, which can increase noise.
- Chipping ice with sharp tools. This can turn a fixable nuisance into a major repair.
- Ignoring leveling and wall contact. One touchpoint can act like a speaker and amplify vibration.
Pro tip (quick clarity)
Record a 10-second clip from inside and another from the back/bottom. If the sound “moves” with the recording position, you’ve already done the most important diagnostic step: zone proof.
Serious cases (stop and call service)
Stop and get qualified service if the sound becomes harsh grinding/metal noise, temperature rises quickly, breakers trip, you smell burning, the cord/outlet feels hot, or the unit becomes unusually hot near the back/bottom.
FAQ
Is freezer making loud humming noise always a compressor problem?
No. Loud hum is often normal vibration amplified by wall contact/leveling issues, or an evaporator fan rubbing ice. That’s why the door + location tests come first.
Why does the noise change when I open the freezer door?
Many units change fan behavior when the door opens. If the sound changes right away, it strongly suggests the inside fan zone (and sometimes ice rub).
What’s the safest way to fix ice rubbing a fan?
Unplug the unit, open the doors, use towels, and let ice melt naturally. Avoid sharp tools. After a full defrost, restart and re-check noise and temperature stability.
Can dust really make the hum louder?
Dust can increase heat stress and run time, and it can also create rattles near the bottom area. Cleaning the rear/bottom area safely often reduces noise.
What freezer temperature should I aim for?
A common recommended target is 0°F (-18°C). If the freezer can’t hold temperature while the hum worsens, treat it as urgent.
When should I stop DIY and call a pro?
Stop if you smell burning, see scorching, breakers trip, the cord/outlet gets hot, the unit becomes unusually hot near the back/bottom, or temperatures rise quickly.
Internal Links
- https://homefixatlas.com/freezer-frost-build-up/ — Frost patterns, air leaks, and why ice buildup can trigger fan noise.
- https://homefixatlas.com/freezer-not-freezing-enough/ — If the hum comes with warming temps, use this airflow + cooling checklist.
- https://homefixatlas.com/refrigerator-making-clicking-or-buzzing-noises/ — Sound decoder for buzzing/clicking and what’s normal vs urgent.
Sources & References
- USDA FSIS — Refrigerator and freezer temperature guidance (0°F / -18°C target)
- Whirlpool — Freezer troubleshooting (buzz/hum causes and common checks)
Professional safety note
This guide is informational and starts with safe, external checks. Internal disassembly and electrical work can be hazardous. If you suspect overheating or electrical issues, unplug the unit and contact a qualified professional.
Update log: 2026-01-26 — Merged the strongest elements into a zone-first, proof-based diagnostic flow; simplified noise physics; expanded stop-lines, matrix, and safe fix paths.

I publish step-by-step troubleshooting guides for common home appliance issues (washer, dryer, refrigerator, HVAC basics).
Content is written for everyday homeowners and cross-checked with manufacturer manuals, safety guidance, and trusted public resources.
Posts include practical checks, clear stop-signs for safety, and guidance on when it’s better to call a qualified technician. Updates are logged whenever steps or recommendations change.
Safety note: If you smell gas, see burning, or suspect electrical hazards—stop immediately and contact a qualified professional.