
How do I clean refrigerator coils safely?
To clean refrigerator coils safely, disconnect power, access the coils from the front or back, and remove dust using a vacuum and soft brush. Clean coils release heat more efficiently, which can help the fridge cool more consistently and reduce unnecessary strain. Step-by-step instructions with photos are explained below.
⚠️ Safety First: Unplug the refrigerator or switch off power at the breaker before cleaning. Avoid sharp coil fins and moving condenser fans. Warning: Use protective gloves; coil fins and nearby metal edges can be sharp. Do not spray water directly on electrical components.
Tools Needed
| Tool | Purpose |
|---|---|
| Vacuum (with brush attachment) | Removing loose dust and pet hair |
| Coil cleaning brush | Reaching between coil fins safely |
| Flashlight | Seeing buildup behind panels |
Why Dirty Refrigerator Coils Can Cause Performance Issues
Last updated: January 3, 2026
Cleaning refrigerator coils is one of the most overlooked maintenance tasks. Dust and pet hair can act like insulation, trapping heat instead of letting the refrigerator release it efficiently. When the condenser area can’t shed heat well, the refrigerator may run longer, temperatures can drift more easily, and you may notice extra noise or warmth near the back/bottom of the unit.
Plain-English takeaway: If the coils are packed with dust, your fridge can end up working harder than it needs to.
Table of Contents
- 1) Where Refrigerator Coils Are Located
- 2) Step-by-Step Coil Cleaning Protocol
- 3) How Often Coils Should Be Cleaned
- 4) What Often Improves After Cleaning
- 5) FAQ
- 6) How This Guide Was Prepared
- 7) Important Safety Notice
- 8) References
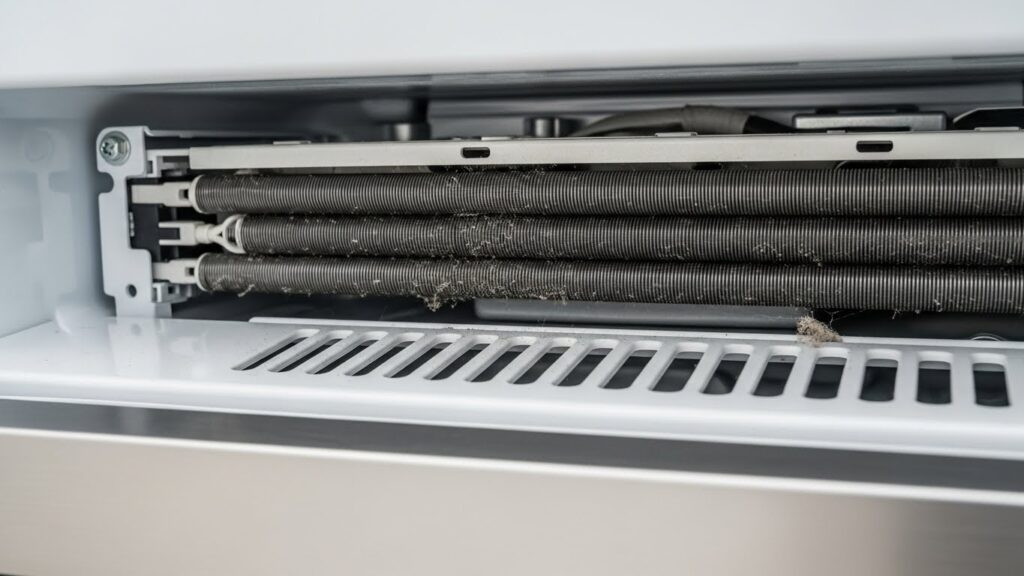
1) Where Refrigerator Coils Are Located
Refrigerator condenser coils are commonly found in one of two places:
- Underneath the unit: accessed by removing the front kick plate or grille (common on many designs).
- Behind the unit: accessed by removing a rear lower panel (often cardboard or metal).
2) Step-by-Step Coil Cleaning Protocol
Step 1 — Disconnect power
Unplug the refrigerator or switch off power at the breaker. Avoid cleaning while the unit is energized, since a condenser fan may start automatically on some models.
Step 2 — Access the coil area
Remove the front grille/kick plate or the rear lower access panel (depending on your model). Use a flashlight to check how much dust has built up and where the fan is located.
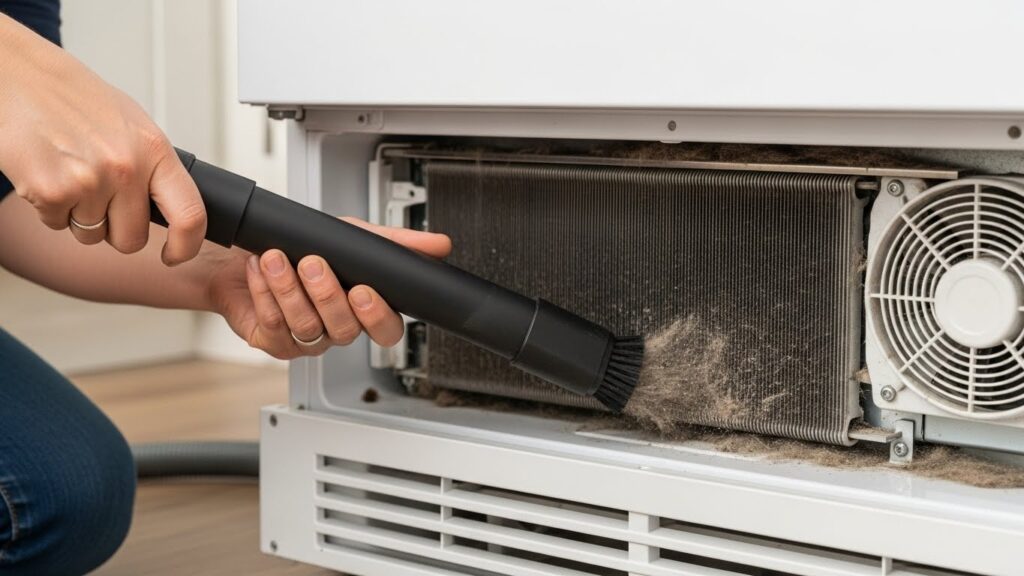
Step 3 — Vacuum loose debris first
Use a vacuum with a brush attachment to remove surface dust and pet hair. Work gently to reduce the chance of bending fins or dislodging nearby wiring.
Small-space trick (optional): If the gap is narrow, you can tape a flattened cardboard tube to the vacuum hose to create a slim “crevice” shape. Skip this if it feels unstable—safety and control matter more than reaching every last speck.
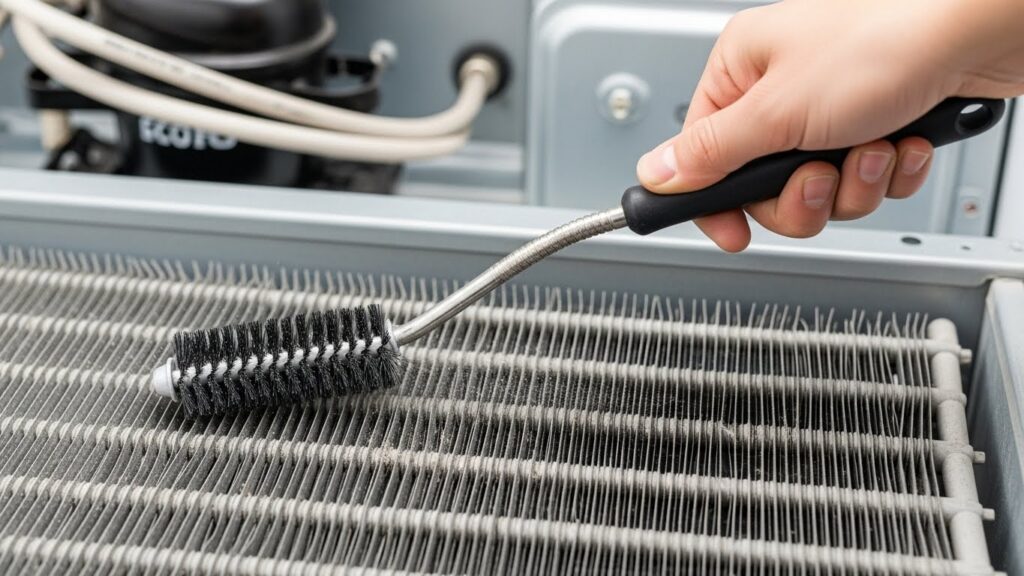
Step 4 — Brush between coil fins, then vacuum again
Use a long coil brush to loosen trapped dust between fins, then vacuum again to capture what’s released. Take your time—aggressive scrubbing can bend fins and reduce airflow.
Don’t skip the fan: If your model has a condenser fan near the compressor, check that the blade is clear of dust clumps and that nothing (like a loose wire) is touching it. A blocked or rubbing fan can keep performance poor even after the coils look cleaner.
Step 5 — Reassemble and restore power
Replace panels securely and restore power. You may notice the refrigerator runs more smoothly over the next few hours as airflow improves.
Stop point: If the coil area is oily, badly damaged, or not safely reachable without removing major panels, it’s safer to contact a qualified appliance technician. Oily residue can sometimes indicate a mechanical issue that cleaning alone won’t solve.
3) How Often Coils Should Be Cleaned
- Every 6–12 months: typical households without heavy dust or shedding pets.
- Every 3–6 months: homes with shedding pets, high dust, or heavy kitchen grease in the air.
Rule of thumb: If you can see dust buildup around the intake/grille, the coils inside are likely due.
4) What Often Improves After Cleaning
- More stable temperatures: less drift during busy kitchen hours or frequent door openings.
- Shorter run times: the compressor may not need to work as long to move heat out.
- Lower operating noise: less strain can mean fewer loud cycles (results vary by model).
- Better efficiency over time: many households notice smoother day-to-day operation after routine coil care.
5) FAQ
Can I use compressed air to clean the coils?
Yes, but it often blasts dust into the room and deeper into corners if you’re not careful. For most households, vacuum + coil brush is the cleaner and more controlled approach.
My fridge is still warm after cleaning. Is that normal?
If the refrigerator was struggling before, it can take time to stabilize. Give it several hours, and monitor temperatures over the next day. If cooling remains poor, the issue may involve airflow, fans, seals, or another component beyond coil dust.
Do newer refrigerators still need coil cleaning?
Usually yes. Even “hidden” condenser designs have intake paths that can collect dust. Check your owner’s manual for the recommended maintenance routine for your model.
When should I call a technician?
If you hear abnormal grinding from the condenser area, see oily residue, notice burning smells, or the refrigerator won’t cool properly after basic cleaning and ventilation checks.
6) How This Guide Was Prepared
This guide follows common maintenance guidance from major manufacturer help resources and public energy-efficiency references, prioritizing safe, homeowner-level steps that don’t require electrical testing or sealed-system work.
7) Important Safety & Information Notice
This article is provided for general informational purposes only. Refrigerator servicing can involve electrical components, sharp edges, and moving fans. Always follow your manufacturer’s instructions. If you are unsure at any point, stop and contact a qualified appliance technician.
8) References
Related Guides on This Site
- Refrigerator Runs Constantly
- Fridge Temperature Fluctuating
- Refrigerator Making Clicking or Buzzing Noises

I publish step-by-step troubleshooting guides for common home appliance issues (washer, dryer, refrigerator, HVAC basics).
Content is written for everyday homeowners and cross-checked with manufacturer manuals, safety guidance, and trusted public resources.
Posts include practical checks, clear stop-signs for safety, and guidance on when it’s better to call a qualified technician. Updates are logged whenever steps or recommendations change.
Safety note: If you smell gas, see burning, or suspect electrical hazards—stop immediately and contact a qualified professional.