Why does my fridge smell bad even after cleaning?
Persistent fridge odors usually happen because odor-causing bacteria remain in hidden areas, air circulation is blocked, or the defrost drain / drain pan / gasket folds hold residue. Surface wiping alone rarely removes the real source. A deep, step-by-step cleaning method is explained below.
- Flush the Defrost Drain: Clear residue trapped inside the internal drain tube.
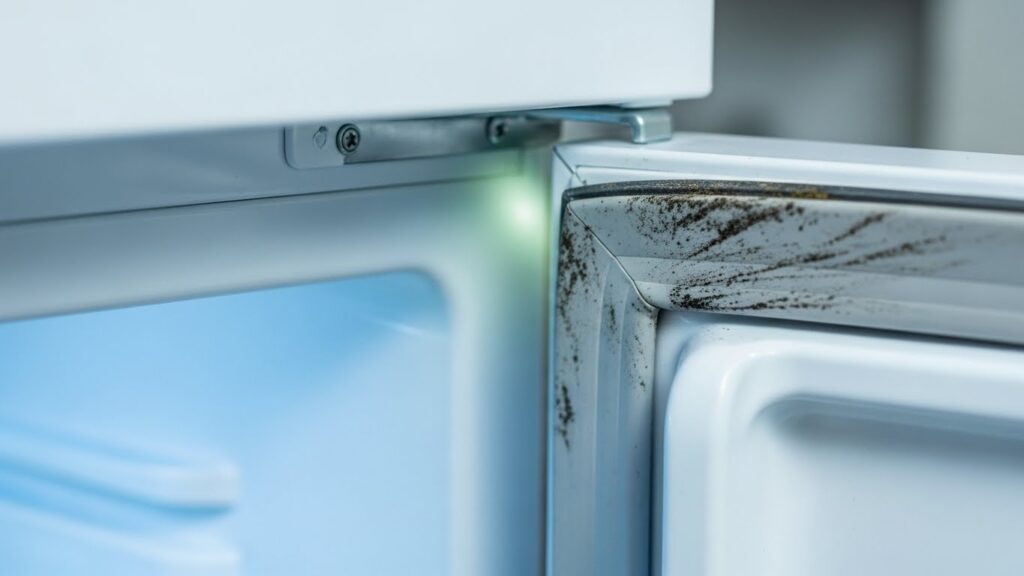
- Deep-Clean Gaskets: Scrub rubber folds where moisture and bio-residue hide.
- Sanitize Spill Zones: Remove drawers to clean the hidden floor and rails.
- Check/Replace Air Filter: Replace the carbon/deodorizer filter if your model has one.
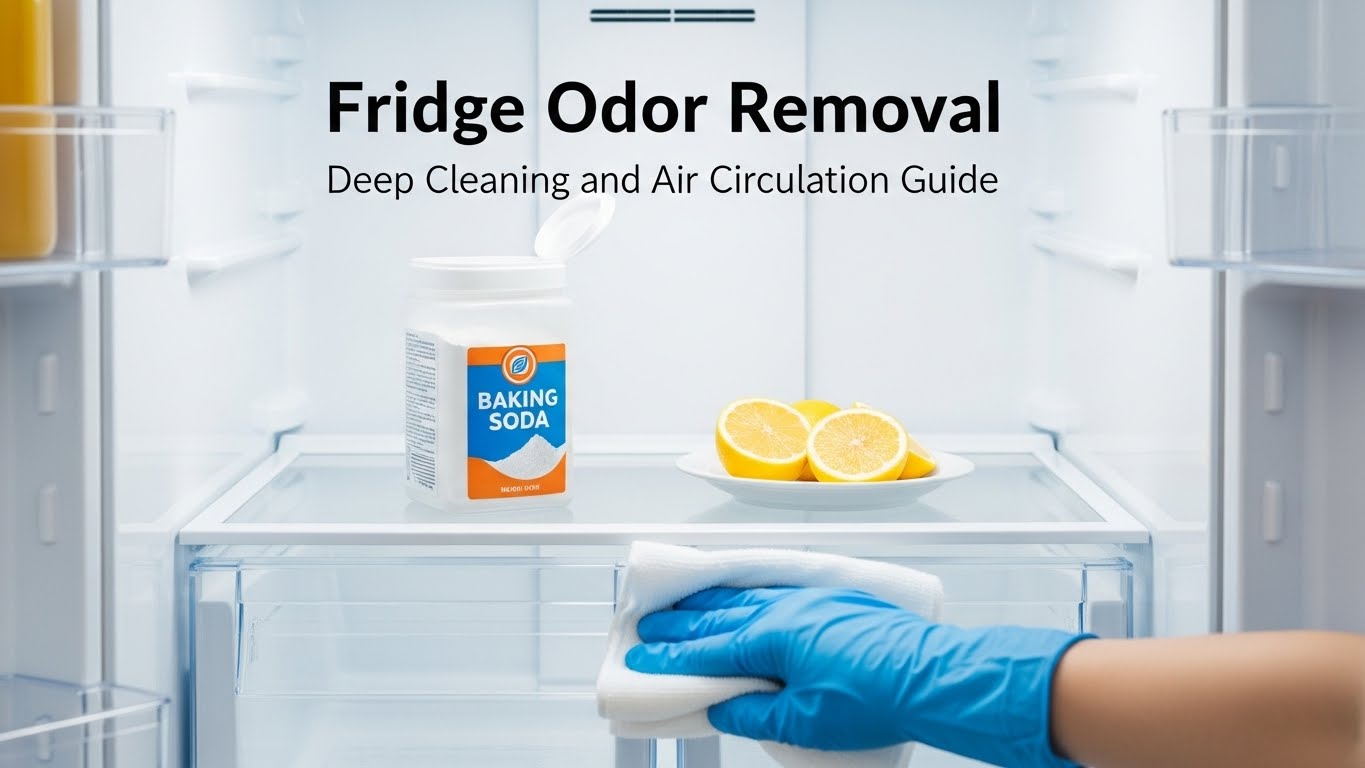
- Use Odor Absorbers: Activated charcoal can absorb a wider range of odors than masking methods.
⚠️ Safety First: Unplug the refrigerator before deep cleaning, removing shelves, or accessing the drain pan. Avoid mixing cleaning chemicals (like bleach and ammonia) and ensure good ventilation.
Tools Needed
| Item | Purpose |
|---|---|
| Baking soda | Neutralizing acidic odors |
| White vinegar or mild detergent | Removing odor-causing residue |
| Soft brush / old toothbrush | Cleaning seals and corners |
| Warm water | Safe rinsing |
| Turkey baster / squeeze bottle | Flushing the defrost drain line |
| Microfiber cloths | Drying to prevent moisture-return odors |
How Refrigerator Odors Actually Form
Last updated: January 2, 2026
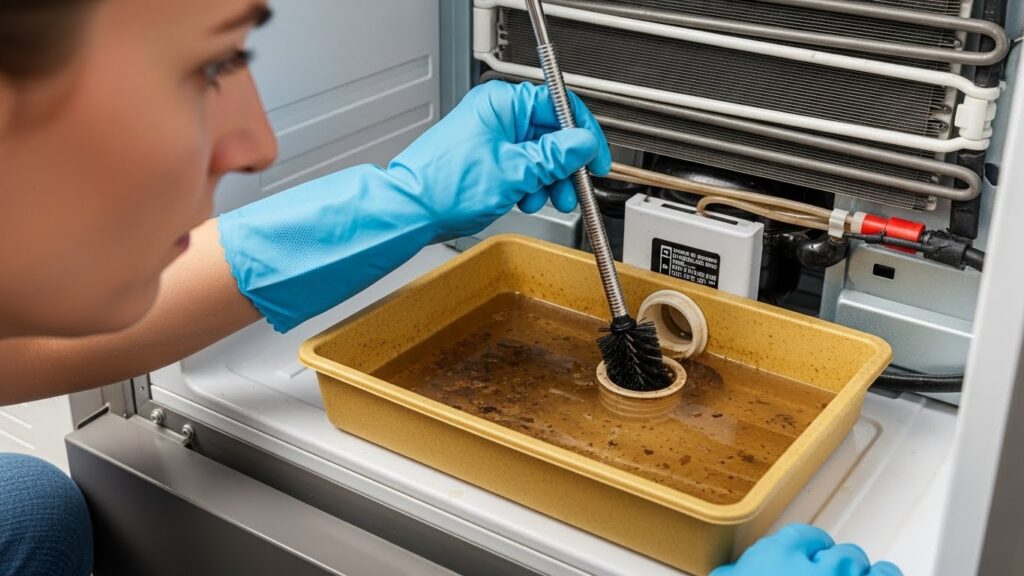
Fridge odor removal fails when cleaning focuses only on visible shelves. Food spills, moisture, and temperature swings let odor-causing bacteria settle in gaskets, drain paths, and stagnant air zones. If the source stays damp and unventilated, smells bounce back fast—even when the fridge looks “clean.” Technician insight: One of the most common sources of “mystery smells” is the evaporator drip tray and the internal defrost drain line, where dark, damp conditions allow residue and microbial film to build up.
Key insight: Odors persist when the source remains damp and unventilated—even if the fridge looks clean.
Table of Contents
- 1) Common Sources of Refrigerator Odors
- 2) Step-by-Step Fridge Odor Removal Protocol
- 3) Improving Air Circulation Inside the Fridge
- 4) Preventing Odors From Coming Back
- 5) FAQ
- 6) How This Guide Was Prepared
- 7) Important Safety & Information Notice
- 8) References
1) Common Sources of Refrigerator Odors
- Door gaskets: Trap moisture and food residue inside rubber folds.
- Defrost drain line & drain pan: Collects water + organic buildup that turns stagnant.
- Spill zones: Under drawers, rails, shelf edges, and the “hidden floor” where liquids seep.
- Poor airflow: Overpacked shelves create dead zones where air can’t circulate.
- Old air filter (if equipped): A saturated carbon filter can stop trapping odors effectively.
2) Step-by-Step Fridge Odor Removal Protocol
Step 1 — Remove all food and shelves
Empty the refrigerator completely. Wash removable shelves and bins with warm water and mild detergent. Pro tip: If a bin smells “embedded,” soaking it in warm water with a splash of vinegar can help loosen sticky food residue.
Step 2 — Clean interior surfaces thoroughly
Use a baking soda solution (about 1 tablespoon per quart of water) or diluted vinegar. Wipe seams, shelf rails, and corners slowly—odor sources usually live where cloths don’t naturally reach. Avoid harsh chemicals that can leave lingering fumes.
Step 3 — Scrub door gaskets and seams (slow is faster)
Gently scrub gasket folds and crevices with a soft brush. Then wipe again with clean water and dry thoroughly. Optional care tip: Some people apply a tiny amount of food-safe silicone lubricant to keep gaskets supple, but materials vary by model—use a minimal amount and stop if the surface feels tacky or attracts dust.

Step 4 — Flush the defrost drain line + clean the drain pan
This is where “it still smells” problems often hide. Locate the drain pan (access varies by model). If it’s dirty or smells, wash with warm soapy water and dry completely. Then flush the drain hole using warm water mixed with a small amount of baking soda (a squeeze bottle or turkey baster helps). The goal is to push out hidden residue inside the tube, not to force anything sharp through it.
Step 5 — Dry and ventilate before restocking
After cleaning, leave the doors open for 10–15 minutes to let moisture escape. Odors love dampness. A quick dry-out step prevents the “clean today, smells tomorrow” loop.
Stop point: If odors persist after deep cleaning, hidden issues (blocked drainage, a spill under insulation, or debris near the condenser area) may need professional inspection.
3) Improving Air Circulation Inside the Fridge
- Avoid blocking vents with large containers or bags.
- Leave at least 2 inches of space between items so air can move.
- Don’t pack the back wall tightly—stagnant zones form there first.
- Use lidded containers for strong-smelling foods to keep odors from “traveling.”
Simple habit: Good airflow reduces moisture buildup that supports odor-causing bacteria.
4) Preventing Odors From Coming Back
- Wipe spills immediately—especially along drawer rails and shelf edges.
- Store onions, kimchi, fish, and sauces in airtight containers (glass helps).
- Use odor absorbers: Activated charcoal often lasts longer and absorbs a broader range of odors than quick fixes.
- If your refrigerator has a carbon air filter, replace it on schedule (many are ~6 months).
- Do a “mini gasket wipe” monthly: quick brush + dry is surprisingly effective.
5) FAQ
Q: Why does my fridge smell even when it looks clean?
A: Odors often come from hidden areas like the defrost drain line, drain pan, or gasket folds that stay damp. These spots can hold residue that keeps feeding smells.
Q: Is white vinegar safe for the plastic interior?
A: Generally yes when diluted (often 50/50 with water). If your fridge has special coatings, test a small area first.
Q: Can I use coffee grounds to remove smells?
A: Dry coffee grounds can absorb odors, but they can also add their own smell. For a more neutral option, many people prefer activated charcoal.
Q: Does my fridge have an air filter?
A: Many modern refrigerators (LG, Samsung, Whirlpool and others) include a carbon/deodorizing filter. If it’s overdue, it may stop trapping odors effectively—check your model’s manual.
6) How This Guide Was Prepared
This guide follows cleaning and maintenance recommendations found in manufacturer documentation and public food-safety resources, prioritizing safe household steps before anything that requires disassembly.
7) Important Safety & Information Notice
This article is provided for general informational purposes only. Always follow your refrigerator manufacturer’s cleaning and safety instructions. If you notice persistent odors that seem mechanical (burning smell, electrical odor, repeated overheating), stop using the appliance and contact a qualified technician.
8) References
- FoodSafety.gov: Cold food storage guidelines
- Energy.gov: Refrigerators and Freezers
- Whirlpool: How to Clean a Refrigerator
Related Guides on This Site

I publish step-by-step troubleshooting guides for common home appliance issues (washer, dryer, refrigerator, HVAC basics).
Content is written for everyday homeowners and cross-checked with manufacturer manuals, safety guidance, and trusted public resources.
Posts include practical checks, clear stop-signs for safety, and guidance on when it’s better to call a qualified technician. Updates are logged whenever steps or recommendations change.
Safety note: If you smell gas, see burning, or suspect electrical hazards—stop immediately and contact a qualified professional.